Find Same-Style Design Images via Local Similar Image Search
Designers lose hours not on making new work, but on hunting for references that feel consistent. Assets live on local drives, old project folders, and shared storage, so “same-style” often turns into guesswork. Local similar image search turns visual resemblance into a query, letting you pull same-style images from your desktop library with a single reference.
This guide focuses on an offline, desktop-first workflow (like FlareSeek). It is built for designers who need reliable style matching without uploading sensitive assets to the cloud.
The search intent here is simple: find a consistent visual direction fast, reuse assets confidently, and keep the work local. If you can pull the right references in minutes, the rest of the design process becomes faster and more consistent.
Why same-style assets are hard to locate
Same-style is a visual impression, not a filename. That creates three practical problems:
- Style is multi-dimensional: color, texture, layout, and lighting all contribute, so a single keyword rarely captures it.
- Assets are scattered: exports, screenshots, and final delivery files are split across projects and drives.
- Versions blur together: “final_v7” tells you nothing about the visual look, which makes recall unreliable.
When the library grows, visual similarity is the only dependable way to locate consistent design references.
For brand and marketing teams, this issue scales quickly. A single campaign might involve dozens of adaptations across channels, and every adaptation needs to look like it belongs to the same family. Local similar image search is one of the few practical ways to keep that visual consistency without manual tagging.
How local similar image search matches style
Local similar image search extracts visual features from each image (composition, palette, texture, layout patterns) and ranks results by similarity. The key advantage is that the heavy lifting happens offline: images are indexed locally, and similarity scores are computed on your machine.
It is ideal when you already have a reference image and want to find:
- same-style alternatives for a layout or hero visual
- historical versions with the same structure or palette
- assets that must stay local for privacy or compliance reasons
If you are unsure whether the style is captured, look for consistency in three cues: dominant colors, layout hierarchy, and texture. Those cues are the most stable signals across different exports and versions.
If you do not have a reference image and only a written brief, start with semantic search to expand candidates, then switch to similarity search to narrow. See the guide on semantic search workflows for designers.
Workflow: index → choose a reference → narrow results
Below is a workflow you can reuse for most design projects.
Before the first search, make sure your library is in a usable shape. A clean index and stable folder structure will have a larger impact on accuracy than any single similarity setting.
Step 1: Build a clean local index
Start with one to three high-use folders instead of scanning everything. A smaller, curated index keeps results clean and consistent. For first-time setup, follow the initial indexing guide.
Recommended indexing structure:
- Active project folders (current campaigns, sprints, or launches)
- Brand system assets (logos, typography, palettes, master templates)
- Reusable libraries (past deliverables that still match your current brand)
If you need a deeper overview of library status and indexing progress, the gallery management guide is a helpful reference.
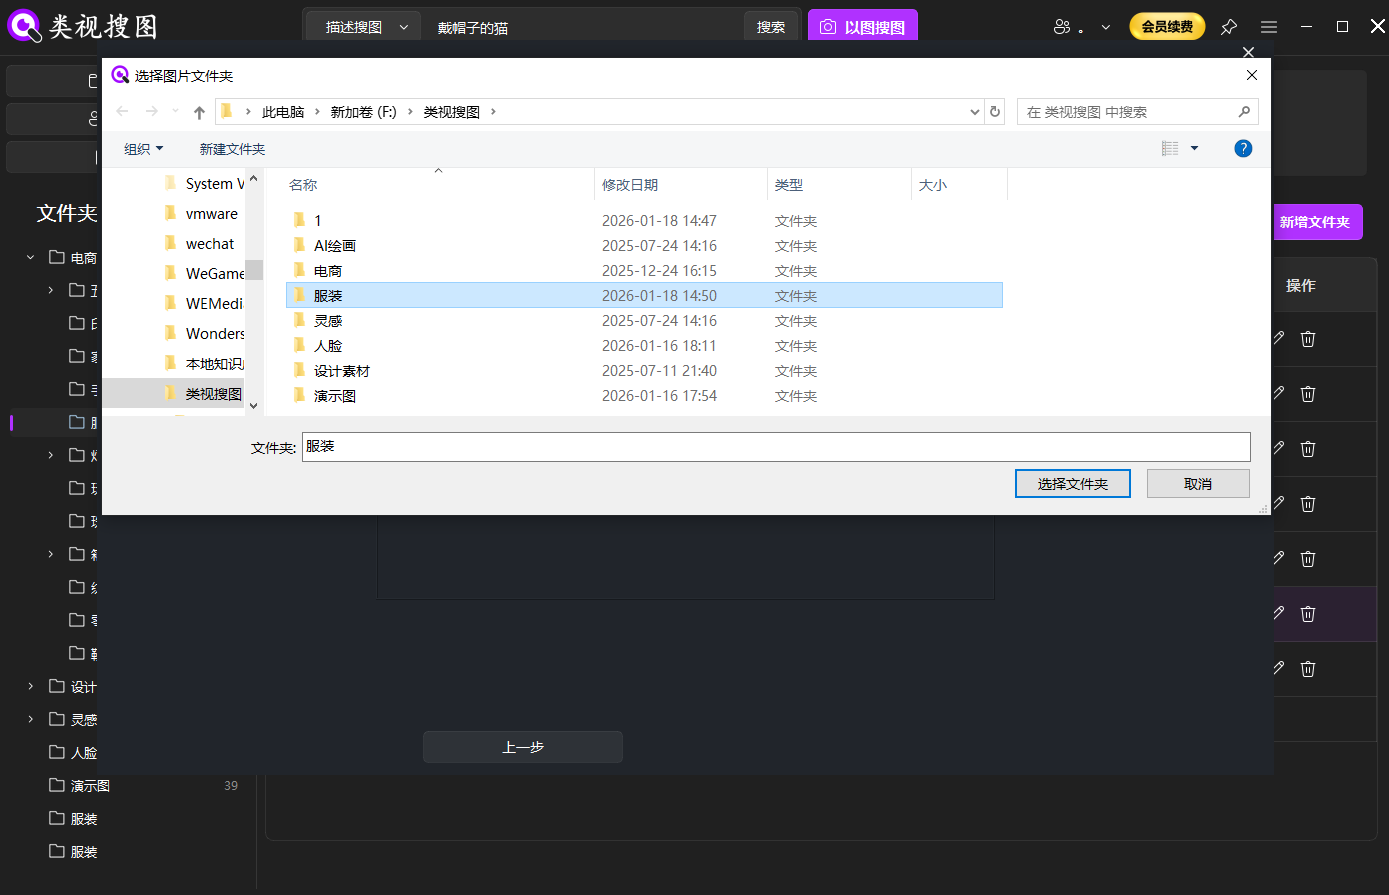 Caption: A focused index improves local similar image search accuracy and keeps results consistent.
Step 2: Pick a high-signal reference image
Choose a reference with clear structure and style cues: consistent lighting, stable layout, and visible texture. Cropped images can work, but avoid removing the elements that define the look (typography hierarchy, dominant colors, pattern details).
Reference selection tips:
- Prefer images with the full layout visible, not just fragments
- Keep the main color palette intact to preserve the style signal
- Include the key texture or pattern if that defines the visual tone
- Avoid heavy compression or watermarks that distort similarity
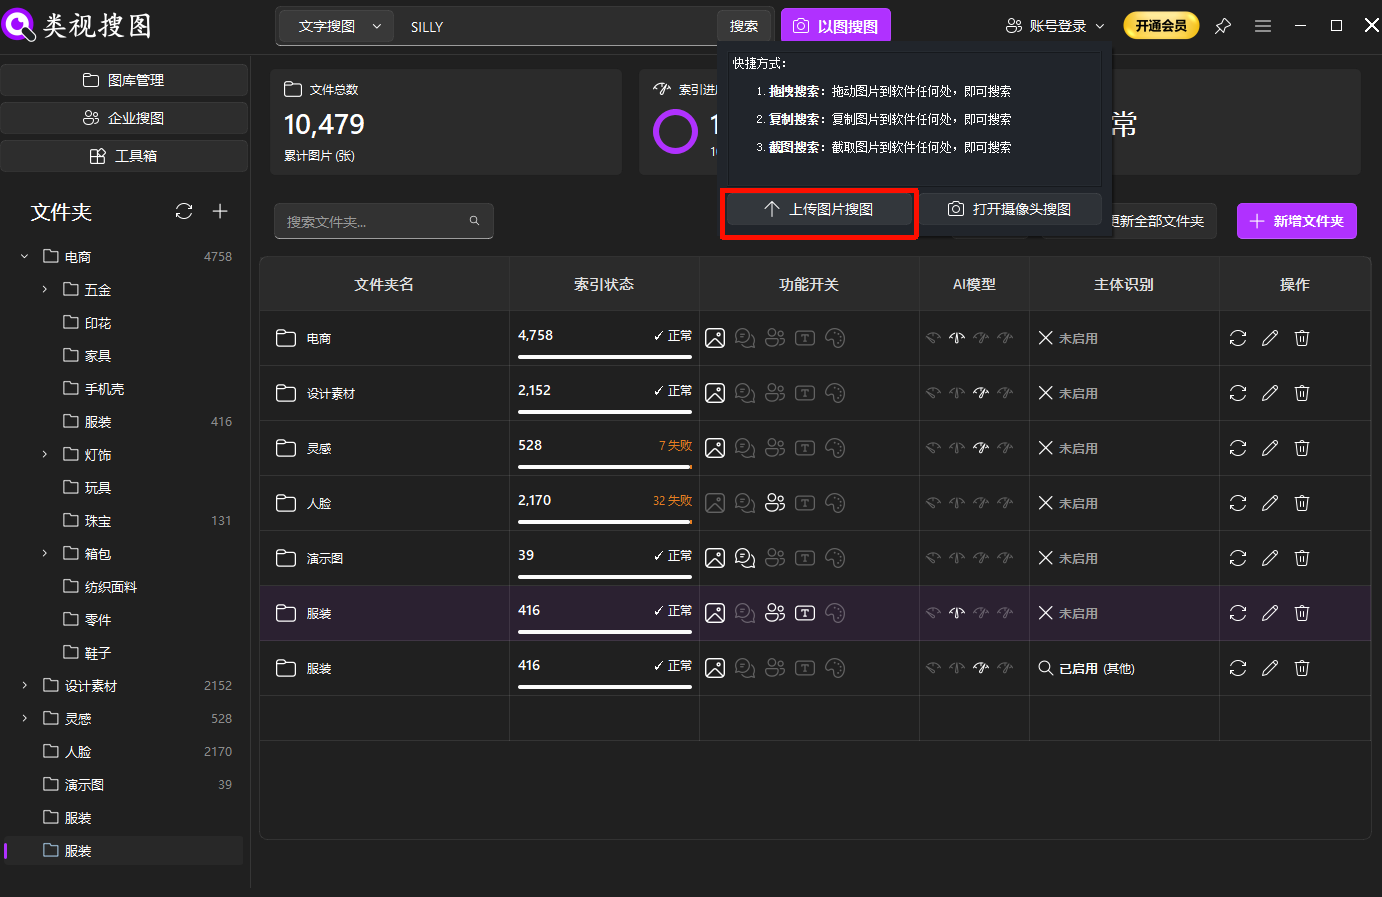 Caption: A strong reference image makes it easier for local similar image search to converge on the right style.
Step 3: Tune similarity and folder filters
When results are too broad, raise the similarity threshold first, then limit the search to a project or brand folder. Once the core set is found, relax the threshold to capture angle or layout variations. For UI details on filters and ranking, see browse and filter results.
Practical tuning sequence:
- High similarity for the closest matches
- Medium similarity for earlier versions
- Lower similarity to explore alternatives
Always locate the source folder once you find a good match. This is what turns a single search into a reusable workflow.
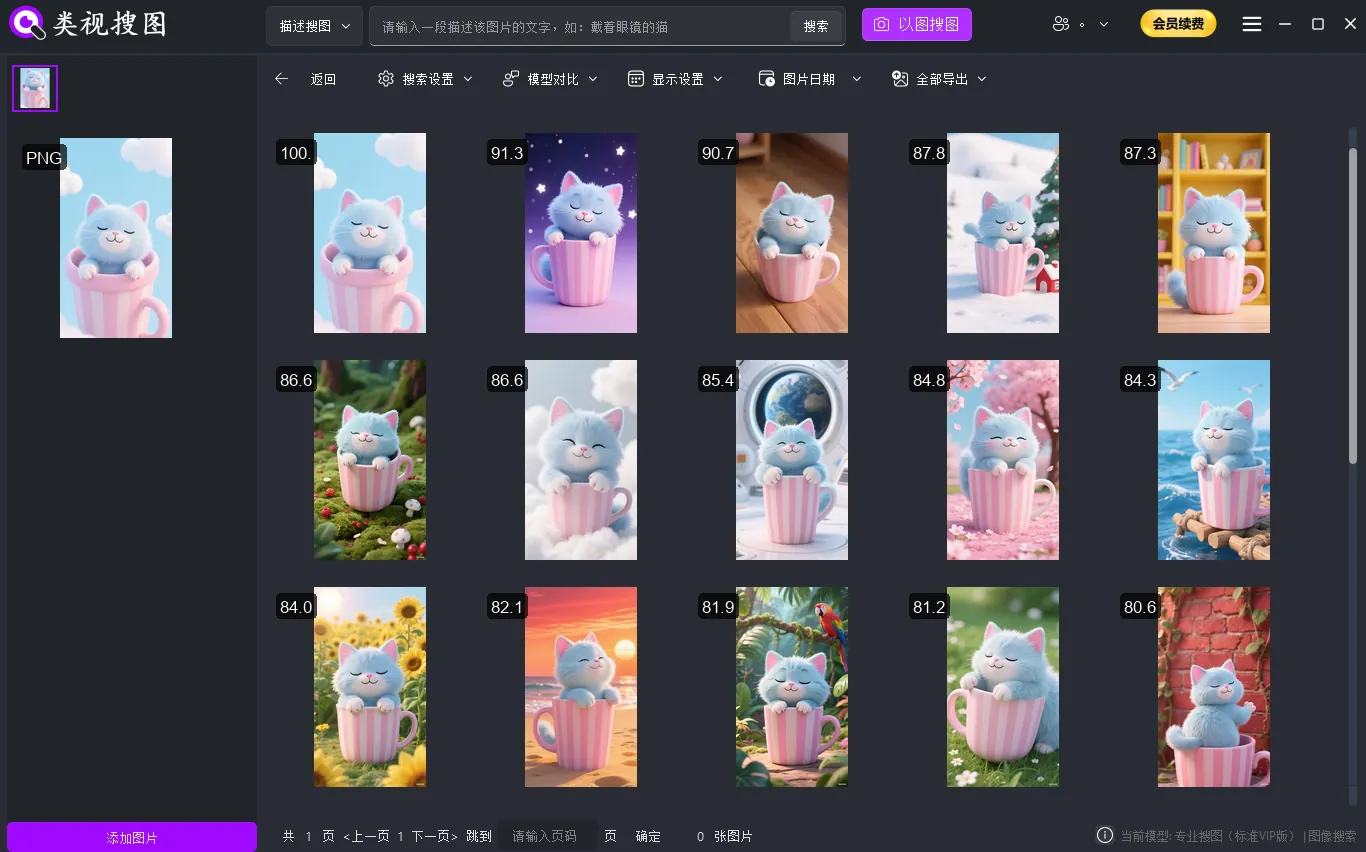 Caption: Narrow first, locate the source folder, then expand the search to collect variations.
Translate style into searchable dimensions
Style matching gets easier when you break “style” into visible dimensions you can recognize at a glance:
- Color and lighting: warm vs. cool, high contrast vs. soft shadows
- Texture and material: grainy paper, metallic sheen, fabric folds, patterned prints
- Layout and hierarchy: grid density, whitespace ratio, headline-to-body balance
- Symbols and motifs: recurring icons, graphic shapes, brand marks
Keeping these dimensions in mind helps you choose better references and quickly judge results. It also improves how you collect and tag assets after the search.
If you work with a team, agree on a shared vocabulary for these dimensions (for example: “low-saturation + wide whitespace + soft shadow”). It will reduce feedback cycles and make review meetings faster.
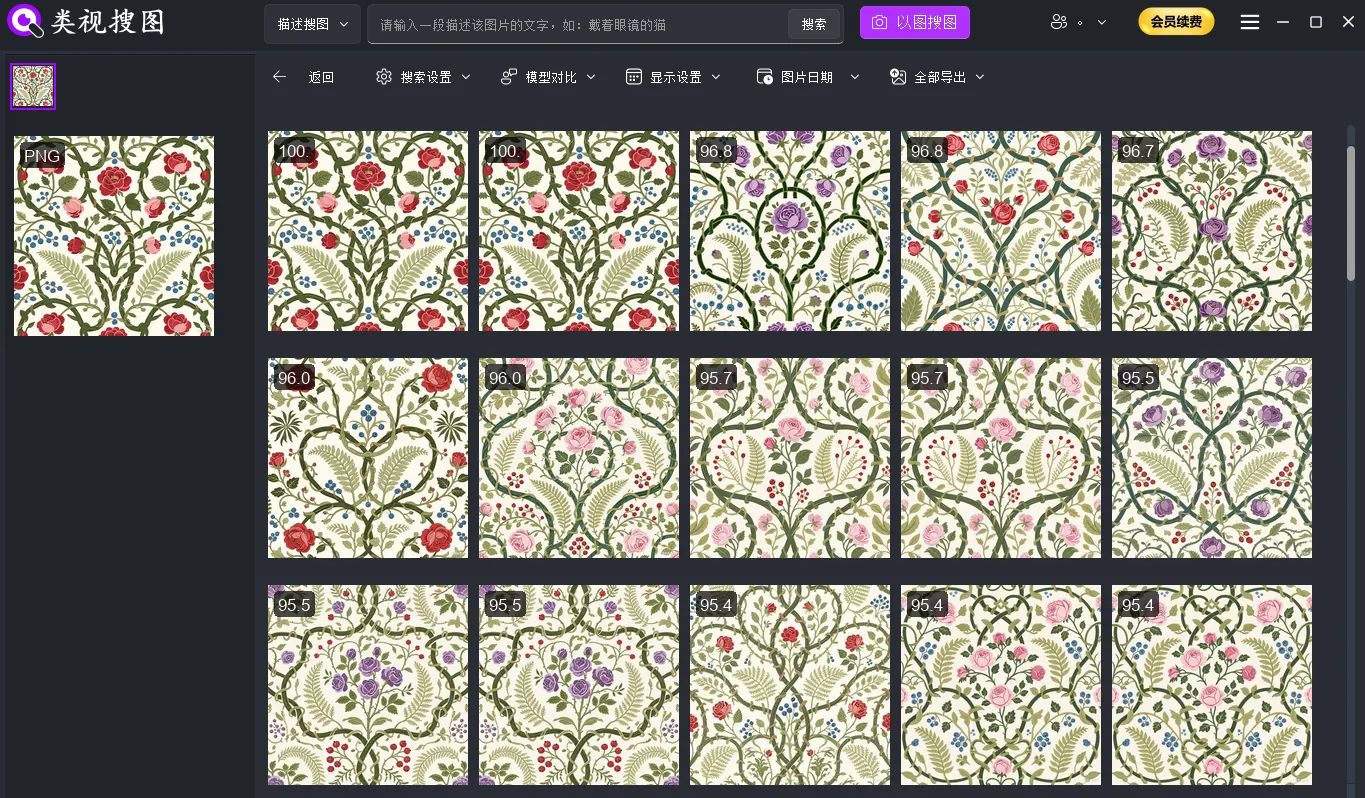 Caption: Pattern and texture cues make same-style decisions more consistent across the library.
Archive and scale the style library
Finding the right references is only half the job. If you do not archive and organize them, you will repeat the same searches each time. After a successful search:
- copy the best matches into a “Reusable / Style Library” folder
- name subfolders by style cues (for example: “low-saturation / minimalist / soft light”)
- keep a short note about the project or campaign that used the assets
This transforms local similar image search from a one-off action into a repeatable asset pipeline.
Make it a team workflow
Local similarity search works best when everyone uses the same structure. Create a shared “Style Library” and agree on how to name folders (for example: “low-saturation / minimalist / soft light”). Then align your review process so the team always archives approved assets after each sprint.
When designers hand off files, include a short note in the folder name or a README about the usage context (campaign, channel, date). This keeps brand consistency intact even when teams rotate or contractors join mid-project.
Multi-channel adaptation without visual drift
Most teams need the same style across web, social, and e-commerce listings. Use local similar image search to find the original master layout, then pull close variants for each channel. You can keep typography and layout structure consistent while changing only the format and call-to-action.
This approach reduces drift: instead of reinventing visuals for every channel, you reuse proven references and only adjust what is necessary. That keeps the brand language tight and accelerates delivery.
FAQ: common obstacles and fixes
Q: Why are the results too noisy?
A: Start with a smaller index and filter by a specific project folder first. Noise usually comes from mixed-purpose directories.
Q: I only have a cropped screenshot. Can it still work?
A: Yes, but increase similarity first and keep key style cues (colors, typography blocks) in the crop.
Q: The results look close but not exact.
A: Use the top results as a new reference image and run the search again. Two rounds of refinement often converge quickly.
Checklist, pitfalls, and next step
Use this checklist to close the loop quickly:
- Index 1-3 high-frequency design folders
- Test with three reference images that represent different styles
- Raise similarity, then filter by folder, then expand to variations
- Always locate the source folder and archive reusable picks
- Review and clean noisy folders weekly
Common pitfalls to avoid:
- Over-cropping the reference image and losing key style cues
- Indexing everything at once and flooding the result set
- Saving search results without locating and archiving the originals
When you can consistently reproduce a style in minutes, your design library becomes a strategic asset rather than a messy archive.
If you hit “no results” or messy ranking, consult the FAQ and troubleshooting checklist.
Ready to turn your local library into a reusable design asset base? Start with one active project folder and run a test with local similar image search. When you are ready, download and try it here.