Semantic Image Search vs Reverse Image Search: Local Guide
If you manage a local image library, the most common decision is semantic image search vs reverse image search. One starts from a description, the other starts from a reference image. Picking the wrong entry point often leads to noisy results or overly narrow matches, which feels like “the search doesn’t work.”
This guide compares both methods in a local workflow, shows when each wins, and provides a stable path to combine them so you can expand candidates, refine matches, and finally locate the source folders for reuse.
Local teams care about privacy, repeatability, and speed. A good workflow must work offline, stay stable across multiple disks, and help you keep a clean, reusable library instead of another pile of scattered folders.
Semantic image search vs reverse image search: choose by the clue you have
The first-principles rule is simple: the clue you hold should decide the entry point.
- Semantic image search: you only have a written description or a concept. It is built for idea expansion, style exploration, and “I can describe it but don’t have the image.”
- Reverse image search: you already have a reference image or a screenshot. It is built to find the same item, same style, or same scene quickly.
- OCR text search: the image has clear text, labels, or numbers. It is best for precise localization after you already have a small candidate set.
If the clue is visual, start with reverse image search. If the clue is textual, start with semantic search. When you have both, combine them to get the best coverage and accuracy.
Use a quick three-signal check to avoid guesswork:
- Is the clue text or pixels? Text means semantic search; pixels mean reverse search.
- Do you need exploration or verification? Exploration favors semantics, verification favors reverse search.
- Does the result need to be a close match? If yes, reverse search should be the final step.
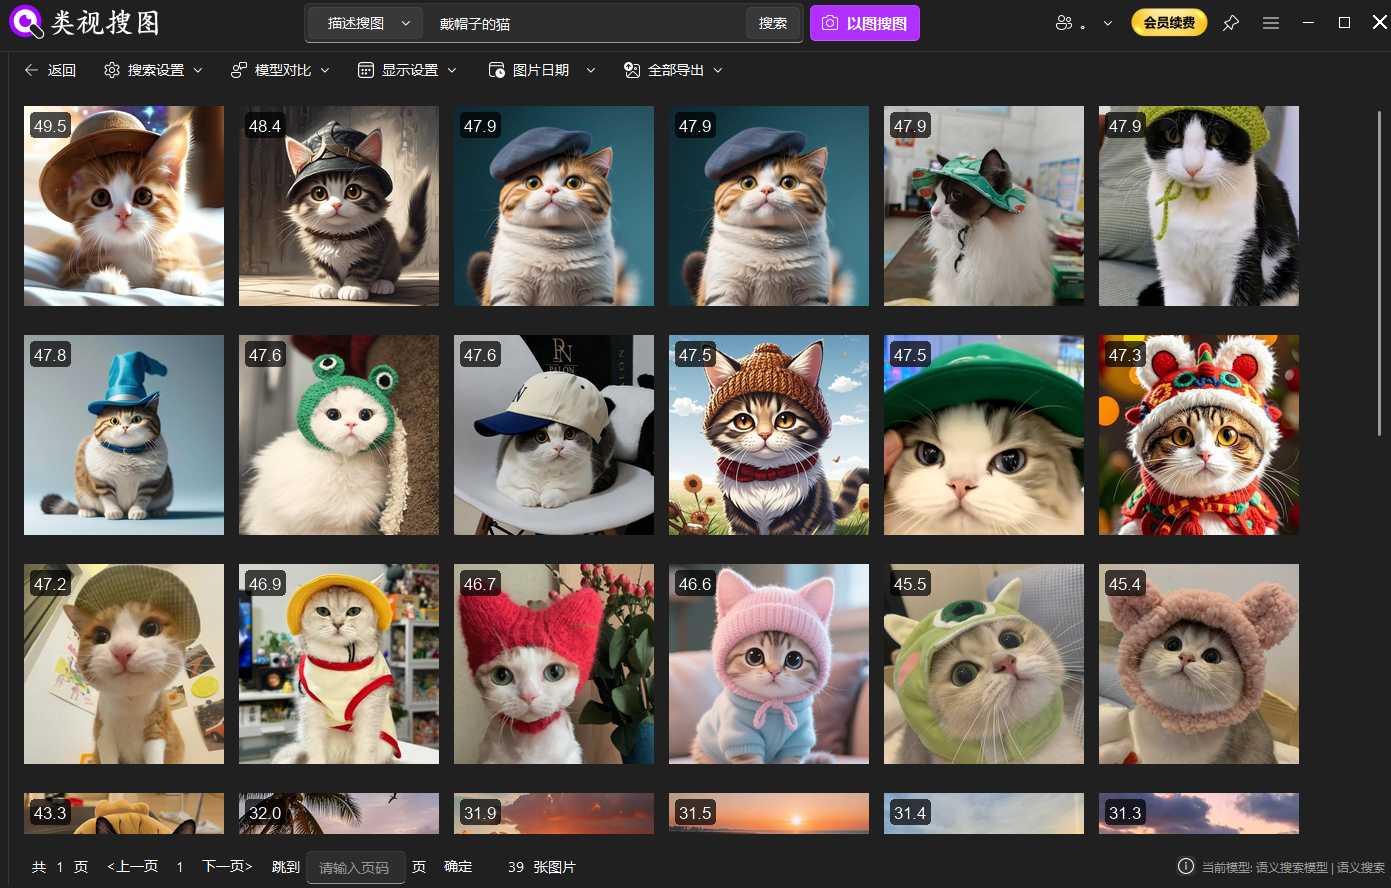 Caption: Semantic search expands the candidate pool when you only have a written description.
Comparison matrix: coverage, precision, stability, and local cost
Local teams care about more than whether a method “works.” They need stable precision, predictable cost, and repeatable results. Use this quick matrix to evaluate both methods:
| Dimension | Semantic Image Search | Reverse Image Search |
|---|---|---|
| Input signal | Text description, style, scene | Reference image, screenshot, crop |
| Coverage | Broad, good for exploration | Narrow, good for exact matching |
| Result stability | Depends on description quality | Depends on reference image clarity |
| Local cost | Heavier semantic understanding | Lighter feature matching, more stable |
The takeaway: semantic search is wide, reverse image search is precise. For local libraries, reverse search tends to feel more stable, but semantic search is the fastest way to discover the right direction when you only know the intent.
To keep results consistent, pay attention to three stability levers:
- Description clarity: concrete, visible attributes outperform abstract words.
- Reference image quality: clear subjects and full frames outperform heavy crops.
- Index hygiene: smaller, high-signal folders outperform noisy global scans.
Local selection paths for three common scenarios
To choose the fastest path, map your need into one of these three scenarios.
- Description only (e.g., “white background product shot, low saturation, soft light”).
- Start with semantic search, then refine with similarity filters and folder constraints.
- Reference image available (e.g., last season’s hero image, a customer screenshot).
- Start with reverse image search, then widen if you need variations.
- Description + reference (e.g., “like this image but cleaner and more minimal”).
- Expand with semantic search, then use reverse search to lock the closest visual match.
Selection checklist for internal alignment:
- Brief-only requests: start with semantic search.
- Competitive screenshots or older versions: start with reverse search.
- Need both breadth and precision: expand with semantic search, refine with reverse search.
- Images with labels or codes: add OCR to pinpoint the exact file.
If you are new to the semantic workflow, review semantic search basics first, then run one reverse search to see how tight the match can be in your local library.
The combined workflow: expand → refine → locate
The most reliable local strategy is not “either/or.” It is a sequence that balances coverage and precision.
- Expand with semantic search
- Use text to pull a wide but relevant candidate pool.
- This prevents you from missing near-matches because your reference image is too narrow or too old.
- Refine with reverse image search
- Pick the closest result and use it as a reference.
- Raise similarity to lock the best-matching set, then lower it slightly to include variants.
- Locate with OCR (if needed)
- If your images contain codes, titles, or labels, OCR narrows the final set quickly.
This sequence is especially effective for design and ecommerce teams: semantic search discovers direction, reverse search stabilizes the final selection, and OCR makes the last mile precise.
Example in ecommerce: pull a wide set using “white background, soft light, low saturation,” then use last season’s hero image to lock the closest product set. Finally, filter by the SKU folder to keep the result tight and version-safe.
Local execution steps: a four-step workflow you can repeat
Below is a local workflow that works for both methods. It is built to keep your library clean and your results repeatable.
Step 1: Index only high-signal folders
Search quality depends on index quality. Start with 1–3 high-frequency folders, avoid download caches, and keep folder naming stable. For first-time setup, follow the initialization guide.
Practical folder strategy:
- Keep a “production-ready” folder separate from “inspiration.”
- Avoid temporary exports and chat caches.
- Expand the index only after your first searches are stable.
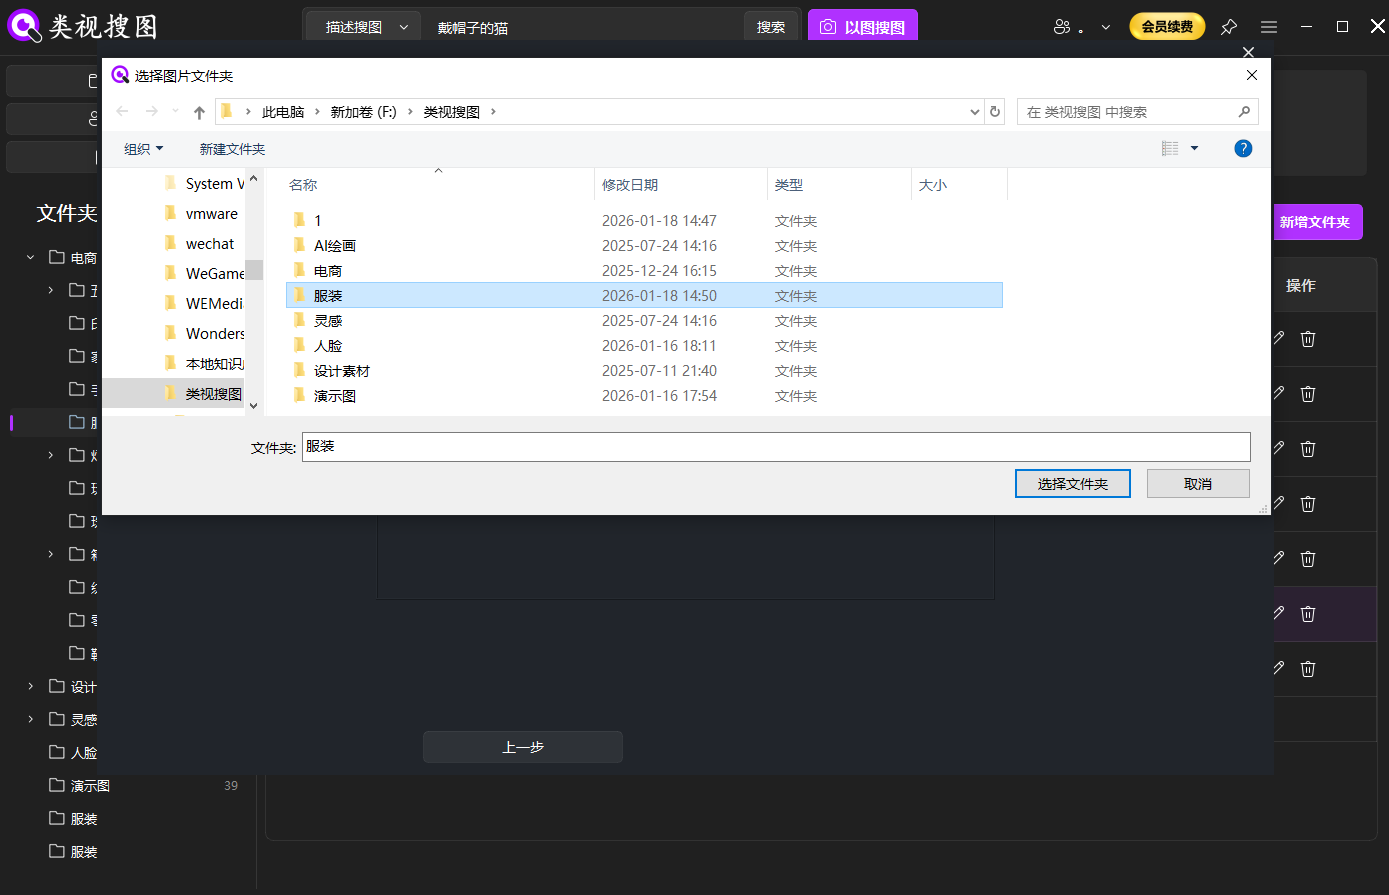 Caption: A clean index is the foundation for stable local results.
Step 2: Choose the entry point and run the first search
- Semantic search: write a description using “subject + scene + style/material + lighting/mood.”
- Reverse search: upload a clean reference image with clear subject features.
Two example descriptions that usually perform well:
- “minimal product shot, white background, soft shadow, low saturation”
- “warm sunset silhouette, backlight, film grain, wide sky”
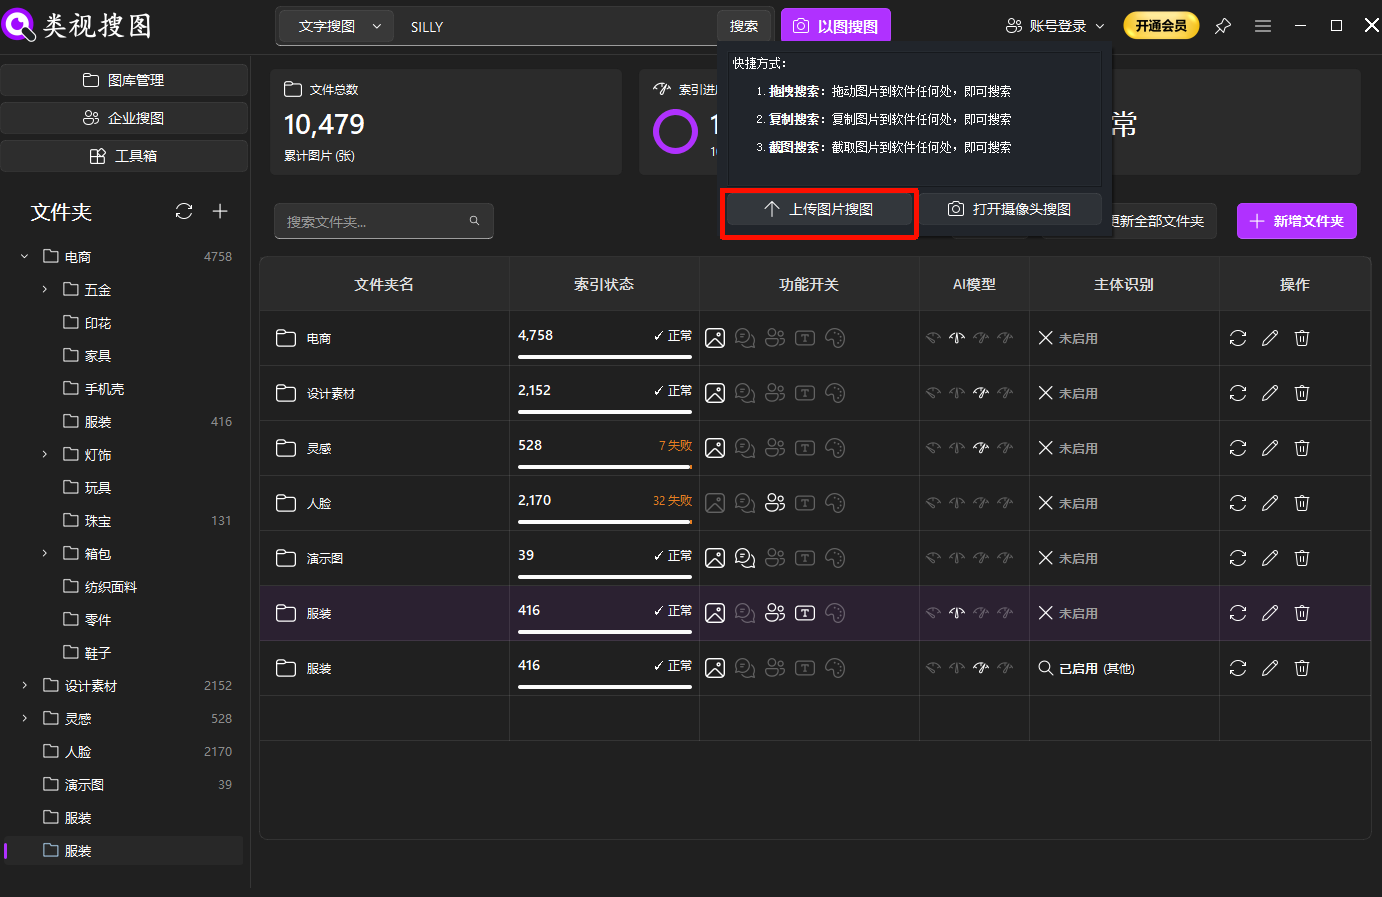 Caption: When you already have a reference, reverse image search locks similar results faster.
Step 3: Use similarity + folder filters to converge
If results are too many, raise similarity, then filter by project folders, then loosen similarity to capture variations. For navigation tips, see result browsing and filtering.
Think in two passes:
- Pass one: high similarity to lock the core set.
- Pass two: slightly lower similarity to capture alternate angles.
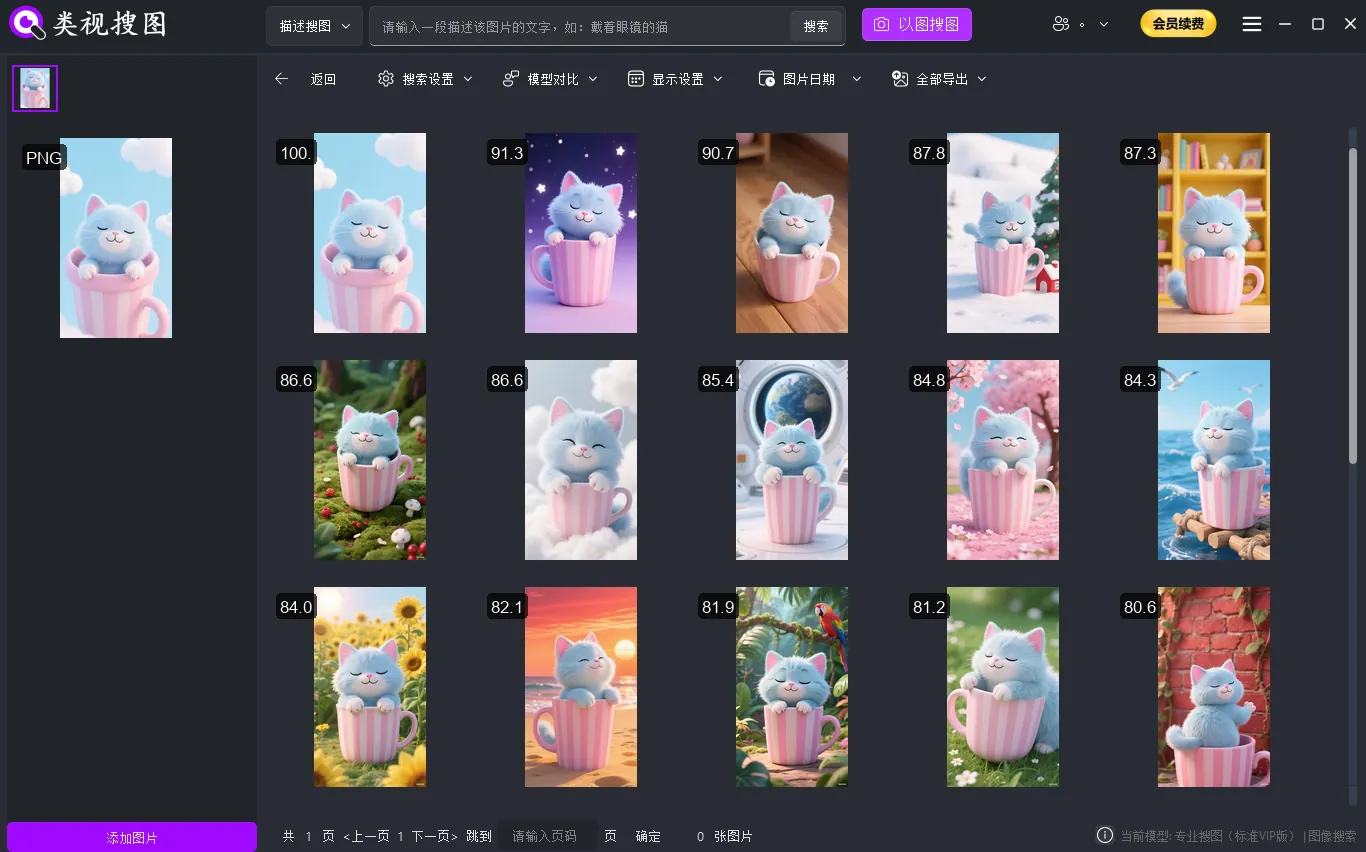 Caption: Converge first, then locate the source folder to reuse assets.
Step 4: Locate the source folder and reuse assets
Local search is only valuable if you can reuse. Always locate the source folder, copy the best assets into a curated library, and keep a clean path for future projects.
Common mistakes that blur the difference
These mistakes often make teams think both methods are the same, when the issue is the workflow itself.
- Indexing everything at once: large noisy libraries dilute both semantic and reverse results.
- Over-cropped reference images: missing key features reduces reverse search accuracy.
- Skipping source folder location: you find the image once, then lose it again.
- Using only one method: semantic search is for breadth; reverse search is for precision.
A clean index and a disciplined “expand then refine” habit usually fix these issues faster than changing models or tools.
Conclusion: a local choice that stays stable
Semantic image search vs reverse image search is not a competition, but a decision about the clue you have. If you have a description, start semantic. If you have a reference, start reverse. When you need both coverage and precision, expand with semantics and refine with image matching.
To get started today:
- Index 1–3 high-frequency folders
- Test reverse search with three reference images
- Test semantic search with five real descriptions
- Save the best results into a curated reuse folder
If you need a troubleshooting checklist after first runs, the FAQ summarizes the most common indexing and accuracy issues.
Ready to try it locally? Download and start.